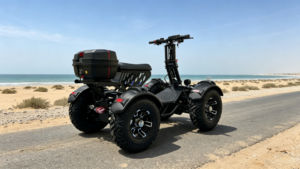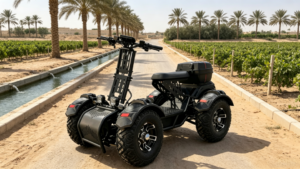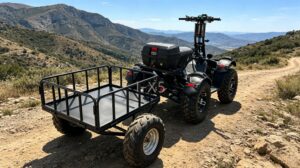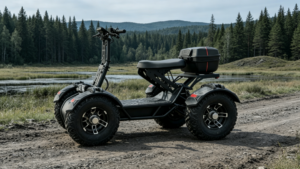
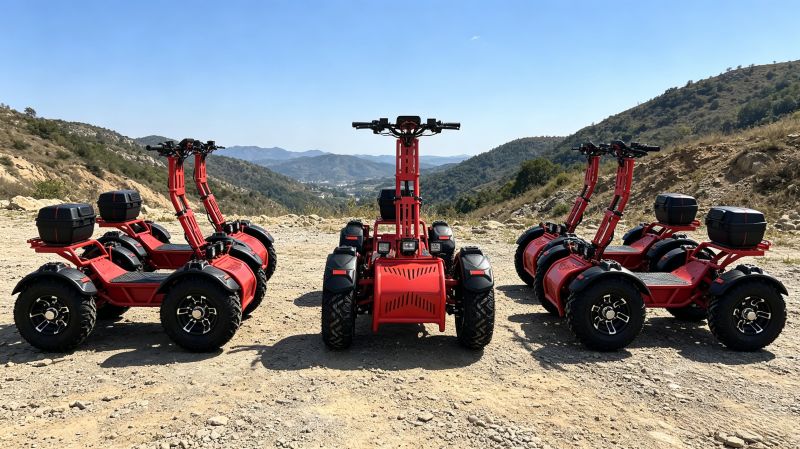
Welcome to the comprehensive driving operation guide for the Edge Scooter Ix5 Electric ATV Scooter. This guide is designed to help you operate your vehicle safely, efficiently, and with confidence across a wide range of terrains and conditions. Whether you are a first-time rider or an experienced off-road enthusiast, understanding these operational principles is essential for both your safety and the longevity of your vehicle.
5.1 Pre-Ride Preparation
Proper preparation before each ride is the foundation of safe operation. Taking a few minutes to check yourself, your equipment, and your environment can prevent accidents and ensure an enjoyable experience.
5.1.1 Personal Condition Check
| Check Item | Requirement |
|---|---|
| Physical Condition | Be well-rested and alert. Never ride if fatigued, under the influence of alcohol, or taking medications that affect reaction time. |
| Vision | Wear appropriate prescription glasses or protective goggles to ensure clear vision at all times. |
| Clothing | Wear form-fitting, durable long-sleeved shirts and long pants. Loose clothing can become entangled in moving parts. |
| Protective Gear | Helmet, gloves, knee pads, elbow pads, and off-road boots must be fully secured before riding. |
| Communication Device | Carry a mobile phone or two-way radio. A satellite communicator is recommended for remote areas. |
5.1.2 Environmental Assessment
| Check Item | Requirement |
|---|---|
| Weather Conditions | Avoid riding in heavy rain, blizzards, high winds, dense fog, or other severe weather conditions. |
| Terrain Familiarity | When exploring unfamiliar areas for the first time, carry a physical map or GPS device. |
| Route Planning | Confirm that your intended route is free of obstacles, dangerous cliffs, and deep water crossings. |
| Notify Others | When riding alone, inform family or friends of your planned route and expected return time. |
| Emergency Supplies | Carry a first-aid kit, drinking water, tire repair tools, and a tow strap. |
5.2 Starting and Stopping the Engine
5.2.1 Starting Procedure
| Step | Action | Notes |
|---|---|---|
| 1 | Confirm vehicle is in P (Park) gear. | Prevents unintended movement during start-up. |
| 2 | Confirm drive mode: 2WD for flat ground, 4WD for complex terrain. | Select based on upcoming riding conditions. |
| 3 | Insert key and turn clockwise to ON. | Instrument panel will perform self-check and display all indicators. |
| 4 | Wait 3–5 seconds and confirm no fault codes are displayed. | If fault codes appear, refer to Chapter 8: Troubleshooting. |
| 5 | Squeeze the brake lever. | Some models require brake engagement to enable starting. |
| 6 | Shift gear to D (Drive) . | Confirm the display shows “D”. |
| 7 | Slowly release the brake and gently twist the throttle. | Keep initial speed below 5 km/h for controlled takeoff. |
| 8 | Ride straight for 10–20 meters to verify normal operation. | Check for unusual noises, pulling to one side, or abnormal vibrations. |
⚠️ WARNING: The I-X5 features electric hub motors that deliver maximum torque from zero RPM. Excessive throttle at start-up can cause sudden, violent forward lurching, leading to loss of control. Always apply throttle slowly and progressively.
5.2.2 Shut-Down Procedure
| Step | Action | Notes |
|---|---|---|
| 1 | Decelerate to a complete stop. | Release throttle 20–30 meters in advance and coast. |
| 2 | Squeeze brakes firmly to ensure vehicle is stationary. | On slopes, additionally engage foot brake if equipped. |
| 3 | Shift to P (Park) . | Confirm the display shows “P”. |
| 4 | Release the brake lever. | |
| 5 | Turn key counter-clockwise to OFF and remove it. | |
| 6 | Turn off all light switches. | Prevents battery drain during parking. |
| 7 | For extended parking, disconnect main battery power (optional). | Prevents standby power consumption. |
5.3 Basic Driving Operations
5.3.1 Throttle Control
| Operation | Technique | Precautions |
|---|---|---|
| Start-Up | Apply 10–20% throttle, feel the vehicle’s response, then gradually increase. | Avoid “rocket starts” that can cause loss of control. |
| Cruising | Maintain steady throttle opening; make fine adjustments to hold target speed. | Electric vehicles respond very quickly; delicate control is needed. |
| Acceleration for Overtaking | Confirm the path ahead is clear; quickly apply 50–80% throttle. | Shift weight rearward to prevent front wheel lift-off. |
| Deceleration/Coasting | Fully release throttle and allow natural deceleration from motor resistance. | No traditional engine braking—coasting distance will be longer. |
| Emergency Acceleration to Avoid Hazards | Apply full throttle rapidly while maintaining stability. | Emergency use only; not a standard operating technique. |
Throttle Characteristic Note: The I-X5 throttle provides linear control—the rotation angle corresponds proportionally to motor output. However, due to the instantaneous torque characteristic of electric motors, 50% throttle may already deliver over 80% of perceived acceleration. Novice riders are strongly advised to limit maximum speed to below 30 km/h for the first 30 minutes of riding to gradually adapt to the vehicle’s power delivery.
5.3.2 Braking Operation
| Scenario | Operation Method | Technique Notes |
|---|---|---|
| Routine Deceleration | Release throttle and coast, then gently apply front brake. | Use coasting distance to reduce brake pad wear. |
| Smooth Stop | Apply front and rear brakes progressively together. | Aim for 60% front, 40% rear braking force distribution. |
| Emergency Braking | Quickly squeeze both brakes and shift body weight rearward. | Prevents front wheel lock-up and forward roll-over. |
| Downhill Braking | Use intermittent (pumping) braking; avoid prolonged squeezing. | Prevents brake fluid overheating and fade. |
| Wet/Slippery Surfaces | Brake earlier and more gently; avoid sudden hard braking. | Reduced tire grip significantly extends stopping distance. |
⚠️ WARNING: The I-X5 uses hydraulic disc brakes with a feel different from electric bicycles or motorcycles. First-time riders should practice braking repeatedly in an open area to become familiar with lever travel and braking force.
5.3.3 Steering Operation
| Scenario | Operation Method | Body Posture |
|---|---|---|
| Low-Speed Turns | Slowly turn handlebars with slight body lean. | Lean body slightly toward the inside of the turn. |
| Medium-Speed Corners | Reduce speed before entry; maintain steady throttle through the turn. | Shift body weight toward the corner’s center; grip the vehicle with knees. |
| High-Speed Corners | Brake significantly before entry; progressively reapply throttle through exit. | Lean body substantially inward; look toward the exit point. |
| Sharp Turns / U-Turns | Reduce to minimum speed; increase handlebar turn angle. | In standing mode, place one foot on the ground for balance if needed. |
| Sloped Turns | On uphill turns, position weight to the outside; on downhill, to the inside. | Adjust weight distribution to prevent rollover. |
Steering Principle: SLOW IN, FAST OUT—brake thoroughly before entering a turn, maintain stability through the corner, and gradually accelerate as you exit.
5.3.4 Reversing Operation
| Step | Action | Notes |
|---|---|---|
| 1 | Ensure the vehicle is completely stopped. | Never shift to R while moving. |
| 2 | Squeeze the brake lever. | Prevents unintended movement during gear shift. |
| 3 | Shift gear to R (Reverse) . | Confirm the display shows “R”. |
| 4 | Slowly release the brake. | |
| 5 | Gently apply throttle to reverse at ≤ 5 km/h. | Limited visibility while reversing—frequently look back and check surroundings. |
| 6 | After completing reverse, stop completely and shift back to D or P. |
⚠️ WARNING: Visibility is limited when reversing. Have another person guide you or dismount to check behind the vehicle. Reversing on slopes is strictly prohibited.
5.4 Gear and Drive Mode Usage Guide
5.4.1 Gear Usage Scenarios
| Gear | Application | Speed Limit | Precautions |
|---|---|---|---|
| P (Park) | Parking, charging, inspection, loading/unloading. | 0 km/h | Use with brakes when parking on slopes. |
| D (Drive) | All forward riding scenarios. | Up to 55 km/h | Adjust speed according to terrain and conditions. |
| R (Reverse) | Backing up in tight spaces, U-turns. | ≤ 5 km/h | Only shift after coming to a complete stop. |
5.4.2 Drive Mode Selection
| Mode | Application | Advantages | Disadvantages |
|---|---|---|---|
| 2WD (Two-Wheel Drive) | Flat hard surfaces, paved roads, fuel-efficient riding. | Longer range, more even tire wear. | Reduced traction in complex terrain. |
| 4WD (Four-Wheel Drive) | Steep slopes, sand, mud, snow, rocky terrain. | Maximum traction, superior obstacle clearance. | Higher energy consumption—range reduced by approximately 15–20%. |
Mode Switching Method: Stop or ride at low speed (< 10 km/h), press the drive mode selector button, and confirm the mode change on the instrument panel. Never switch drive modes at high speed—this may cause driveline shock or loss of control.
Recommendation: Use 2WD for daily riding to maximize range. Switch immediately to 4WD when:
- Tires begin to slip
- Climbing slopes exceeding 15°
- Riding on soft surfaces (sand, mud, snow)
- Carrying loads approaching the 300 kg limit
5.5 Terrain-Specific Riding Techniques
5.5.1 Flat Hard Surfaces (Grass, Dirt Roads)
| Technique | Guidance |
|---|---|
| Speed Control | May accelerate normally to medium-high speeds (30–45 km/h). |
| Steering | Normal handlebar steering; watch for potholes and uneven surfaces. |
| Braking | Brake early to avoid sudden stops; maintain controlled deceleration. |
| Drive Mode | 2WD is sufficient; 4WD is unnecessary. |
5.5.2 Sand
| Technique | Guidance |
|---|---|
| Tire Pressure | Reduce to 10–12 psi to increase tire contact area and flotation. |
| Drive Mode | Must engage 4WD. |
| Throttle Control | Maintain steady speed; avoid sudden acceleration or deceleration. |
| Steering | Avoid sharp turns—sand has high side-slip risk. |
| Stopping | Choose firm ground for stopping to prevent getting stuck. |
| If Stuck | Engage 4WD, gently apply throttle, and oscillate handlebars side to side. If needed, dismount, dig out sand, and place traction boards. |
5.5.3 Mud / Wet Terrain
| Technique | Guidance |
|---|---|
| Drive Mode | Must engage 4WD. |
| Speed Control | Maintain low, consistent speed to keep tires turning. |
| Throttle Technique | If tires spin, slightly reduce throttle until traction is regained, then gradually reapply. |
| Route Selection | Follow existing tire tracks; avoid deep water holes. |
| Water Crossing | Refer to Section 3.6.6—water depth must not exceed half the tire radius. |
| Post-Crossing | Stop and test brakes (effectiveness may be temporarily reduced); clean mud from tires. |
5.5.4 Rocks / Gravel
| Technique | Guidance |
|---|---|
| Speed Control | Very low speed (5–15 km/h); choose solid, stable routes. |
| Tire Protection | Avoid sharp rocks that may puncture tubeless tires. |
| Suspension Use | Let the independent suspension absorb impacts—avoid forced impacts. |
| Weight Adjustment | In standing mode, keep knees slightly bent to absorb vibrations. |
| Drive Mode | 4WD—use low-speed, high-torque for climbing. |
5.5.5 Snow / Ice
| Technique | Guidance |
|---|---|
| Drive Mode | Must engage 4WD. |
| Tire Pressure | Reduce to 12–15 psi for better traction. |
| Speed Control | Extremely low speeds; avoid any sudden movements. |
| Steering | Very gentle inputs to avoid side-slip. |
| Braking | Brake early and gently using intermittent pressure. |
| Advisory | Snow riding is extremely hazardous. Ride only when necessary and carry tire chains. |
5.5.6 Steep Slopes
| Technique | Guidance |
|---|---|
| Uphill | Approach with momentum; use 4WD mode; maintain steady throttle. If speed is insufficient at the base, do not attempt to start again mid-slope. |
| Downhill | Descend slowly with weight shifted rearward; use intermittent braking to control speed. Never coast in neutral. |
| Sidehill | Cross slopes perpendicularly whenever possible. If traversing sideways, shift weight toward the uphill side. |
| Maximum Gradient | The vehicle’s limit is 35°. Never attempt to exceed this angle. |
5.6 Standing Mode vs. Riding Mode
The I-X5 offers two riding postures to suit different scenarios:
5.6.1 Riding Mode (Seated)
| Application | Long-distance travel, load transport, comfortable cruising. |
|---|---|
| Seat Installation | Follow Section 4.3.3 for proper seat mounting. |
| Riding Posture | Seated position with both feet on the footrests. |
| Advantages | Comfortable, stable, suitable for extended rides. |
| Precautions | Keep back straight; hands lightly grip handlebars—avoid tension and stiffness. |
5.6.2 Standing Mode
| Application | Extreme sports, technical riding, short off-road sections, quick mounting/dismounting. |
|---|---|
| Seat Removal | Press the seat base release latch and slide the seat rearward to remove. |
| Riding Posture | Stand on the anti-slip footboards with knees slightly bent. |
| Advantages | Lower center of gravity, more agile handling, better terrain visibility. |
| Precautions | Keep knees bent to absorb shocks; shift body weight dynamically with terrain changes. |
Mode Switching Timing: Never switch modes (install/remove seat) while riding. Stop completely, turn off the vehicle, and ensure stability before making any seating changes.
5.7 Loading and Towing Operations
5.7.1 Loading Specifications
| Item | Requirement |
|---|---|
| Maximum Load | 300 kg (including rider weight). |
| Load Distribution | Center gravity as close to vehicle center as possible; maintain left-right balance. |
| Front Load | Front tool rack/basket: ≤ 20 kg. |
| Rear Load | Storage box: ≤ 15 kg; rear cargo rack: ≤ 50 kg. |
| Oversized Cargo | Prohibited—affects center of gravity and obstacle clearance. |
5.7.2 Towing Operation (If Trailer Equipped)
| Item | Requirement |
|---|---|
| Maximum Towing Weight | Recommended ≤ 100 kg (check trailer specifications). |
| Connection Check | Confirm trailer hitch/ball is securely attached and safety chains are connected. |
| Start-Up | Apply throttle gently—the trailer’s inertia requires more gradual acceleration. |
| Turning | Increase turning radius to prevent trailer rollover or scraping. |
| Reversing | Trailer reverses opposite to vehicle direction—requires counter-steering. Have a spotter assist. |
| Braking | Brake earlier than usual; towing significantly increases stopping distance. |
| Slopes | Gain momentum before uphill; descend at low speed with controlled braking to prevent trailer push. |
5.8 Night Riding
| Item | Key Points |
|---|---|
| Lighting | Turn on LED headlights and taillights. When meeting oncoming traffic, switch to low beam. |
| Speed Control | Reduce speed by 30–50%—limited visibility requires longer reaction time. |
| Route Familiarity | If possible, scout routes during daylight; stick to known paths at night. |
| Auxiliary Lighting | May install additional LED spotlights (ensure compliance with local regulations). |
| Fatigue Management | Night riding is more tiring—rest for 10 minutes every hour. |
| Wildlife Caution | In wilderness areas, watch for animals crossing the path. Slow down and observe. |
5.9 Adverse Weather Response
| Weather | Response Measures |
|---|---|
| Sudden Heavy Rain | Find shelter and stop; turn off power. In thunderstorms, never stop in exposed, high-elevation areas. |
| High Winds | Reduce speed; be alert for crosswinds. Avoid high-speed riding on bridges or open areas. |
| Dense Fog | Turn on taillights; reduce speed below 15 km/h; use GPS navigation. |
| Extreme Heat | Avoid prolonged high-load riding. Park in shaded areas to prevent battery overheating. |
| Extreme Cold | Battery performance and range decrease significantly. Bring battery to warm environment before charging. |
5.10 Driving Prohibitions and Common Errors
| Prohibited Action | Consequence | Correct Practice |
|---|---|---|
| One-hand/no-hand driving. | Loss of steering control; unable to respond to emergencies. | Always keep both hands on handlebars. |
| Switching 4WD/2WD while riding. | Driveline shock; potential loss of control. | Switch only when stopped or moving at very low speed. |
| Coasting in neutral downhill. | No engine braking; brake overheating and failure. | Stay in D gear and use motor resistance. |
| Hard braking in corners. | Vehicle side-slip or forward rollover. | Brake before entering the turn; maintain steady throttle through the bend. |
| High-speed riding in standing mode. | Unstable center of gravity—high risk of falling. | Limit standing-mode speed to below 25 km/h. |
| Overloading. | Suspension bottom-out, brake failure, frame damage. | Strictly obey the 300 kg load limit. |
| Riding while fatigued. | Delayed reactions and poor judgment. | Rest 15 minutes every 1–2 hours. |
| Using phone while riding. | Distraction leading to accidents. | Use communication devices only when stopped. |
5.11 Parking and Storage
| Scenario | Procedure |
|---|---|
| Temporary Parking (< 30 minutes) | Shift to P, squeeze brake, turn off power, remove key. |
| Extended Parking (> 30 minutes) | Follow above steps + choose flat, firm ground. Place chocks under wheels if parked on a slope. |
| Overnight Storage | Store in a dry, well-ventilated location. Turn off all power; consider disconnecting the battery. |
| Seasonal Storage (> 1 month) | Clean the vehicle thoroughly. Charge battery to 50% capacity. Store at 10–25°C. Check battery level monthly. |
Safe riding begins with proper procedures and becomes a lifelong habit. May your I-X5 carry you safely to every destination on every adventure.