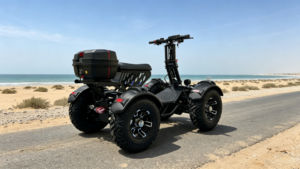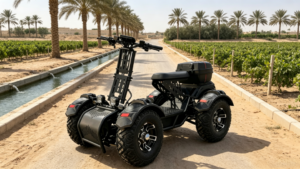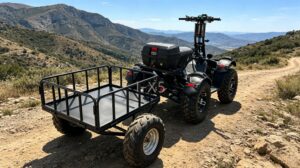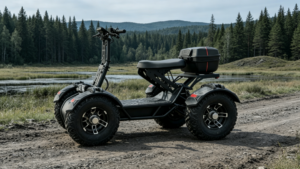
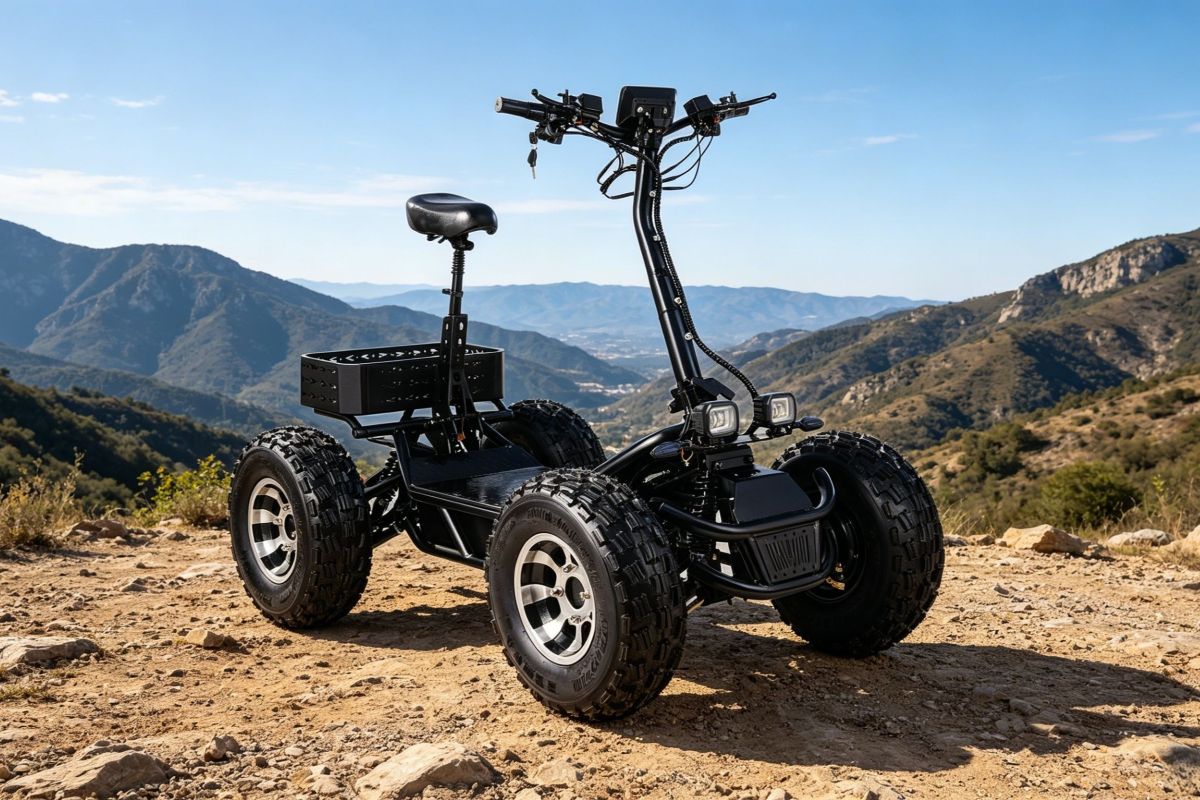
The I-X5 employs an electric four-wheel-drive system that fundamentally changes the maintenance landscape compared to traditional fuel-powered ATVs. Gone are the days of engine oil changes, spark plug replacements, air filter cleanings, and fuel system upkeep. However, regular inspections and care remain essential to keep your vehicle performing at its peak, extend its service life, and ensure your safety on every ride.
Maintenance Schedule Overview
| Maintenance Level | Interval | Primary Focus |
|---|---|---|
| Pre-Ride Inspection | Before every ride | Tires, brakes, lights, battery level, bolt tightness |
| Weekly Maintenance | Weekly or every 50 km | Cleaning, suspension check, lubrication of moving parts |
| Monthly Maintenance | Monthly or every 200 km | Deep brake inspection, tire wear assessment, electrical connections |
| Quarterly Maintenance | Quarterly or every 500 km | Wear-part replacement, battery health check, instrument calibration |
| Annual Maintenance | Yearly or every 2,000 km | Comprehensive overhaul, professional diagnostics, aging component replacement |
Pre-Ride Inspection Checklist
Perform the following checks before each ride:
1.Frame and Structure Inspection
| Item | Check Procedure | Acceptance Standard | Corrective Action |
|---|---|---|---|
| Main Frame | Visual inspection of frame, swing arms, weld points | No cracks, deformation, or rust perforation | Stop use immediately if cracks found; contact after-sales |
| Handlebar Riser | Shake test, telescoping mechanism operation | No looseness, no wobble, reliable locking | Tighten bolts or replace quick-release mechanism |
| Seat | Mounting security, quick-release function | No wobble, latch operates correctly | Adjust or replace base mount |
| Storage Box/Rack | Mounting bolts, load condition | No looseness, within load capacity | Tighten bolts, reduce load |
| Fenders | Mounting status, damage inspection | Securely fastened, intact | Tighten or replace |
2. Tire and Wheel Inspection
| Item | Check Procedure | Acceptance Standard | Corrective Action |
|---|---|---|---|
| Tire Pressure | Use pressure gauge | 15–20 psi (refer to sidewall markings) | Inflate or deflate to standard value |
| Tread Wear | Visual inspection of tread depth | Tread depth ≥ 3 mm | Replace tire |
| Foreign Objects | Check for nails, stones, glass | No embedded objects | Remove objects; check for leaks |
| Sidewall Damage | Check for cuts, bulges | No damage | Replace tire (sidewall damage is non-repairable) |
| Wheel Bolts | Check tightness | No looseness | Torque to specification |
| Wheel Deformation | Spin wheel to check for runout | No noticeable wobble | True wheel or replace rim |
Tire Pressure Reference Guide:
| Terrain | Recommended Pressure |
|---|---|
| Flat Hard Ground | 18–20 psi |
| Mixed Terrain | 15–18 psi |
| Sand | 10–12 psi (increases contact patch) |
| Snow | 12–15 psi |
| Rock/Gravel | 15–18 psi (protects sidewalls) |
3. Brake System Inspection
| Item | Check Procedure | Acceptance Standard | Corrective Action |
|---|---|---|---|
| Brake Lever Travel | Squeeze test | 20–30 mm, no dead play | Adjust or bleed system |
| Brake Fluid Level | Inspect reservoir sight glass | Between MIN–MAX marks | Top up with DOT 4 fluid |
| Brake Fluid Color | Visual inspection | Clear light yellow, not cloudy or dark | Replace brake fluid |
| Brake Rotor/Pads | Check wear thickness | Pads ≥ 2 mm, rotor has no deep scoring | Replace pads/rotor |
| Braking Performance | Low-speed push test | Both front and rear brakes can lock wheels | Overhaul brake system |
| Brake Noise | Listen during braking | No unusual sounds | Check for pad wear or oil contamination |
4. Suspension System Inspection
| Item | Check Procedure | Acceptance Standard | Corrective Action |
|---|---|---|---|
| Shock Absorber Exterior | Check for oil leaks | No oil residue | Replace shock absorber |
| Suspension Travel | Press each corner of vehicle | Returns to rest after 1–2 oscillations | Replace shock absorber |
| Control Arm Joints | Check for play | No abnormal clearance | Tighten or replace bushings |
| Spring Condition | Check for cracks or deformation | Intact, no damage | Replace spring |
| Height Adjustment | Test adjustment function | Smooth operation, reliable locking | Clean or replace adjustment mechanism |
5. Electrical System Inspection
| Item | Check Procedure | Acceptance Standard | Corrective Action |
|---|---|---|---|
| Battery Level | Check LCD display | ≥ 20% (≥ 30% recommended) | Charge before riding |
| Display | Power-on self-test | No fault codes, normal display | Consult fault code table |
| Lighting System | Test headlight, taillight, brake light | All function properly | Replace bulbs or repair wiring |
| Motor Operation | No-load spin test on all wheels | Smooth operation, no abnormal noise | Contact after-sales service |
| Wiring Harness | Visual check for damage or exposure | Insulation intact, no wear | Wrap or replace harness |
| Connector Security | Check all electrical connectors | Tight, no looseness, waterproof covers seated | Reseat or replace connectors |
6. Drive System Inspection
| Item | Check Procedure | Acceptance Standard | Corrective Action |
|---|---|---|---|
| 4WD/2WD Switching | Test switching function | Smooth transition, display reflects correct mode | Inspect controller or actuator |
| Gear Shifting | Test D/R/P positions | Smooth engagement, no binding | Inspect shift mechanism |
| Throttle Response | Gently twist throttle | Linear acceleration, no sudden jumps | Inspect throttle grip or controller |
| Reverse Function | Test R gear | Reverse speed ≤ 5 km/h | Inspect controller |
Cleaning and Care
1. Body Cleaning
| Step | Operation | Precautions |
|---|---|---|
| 1 | Power off, remove key | Prevent accidental startup |
| 2 | Use soft brush to remove surface mud and debris | Avoid hard objects that may scratch paint |
| 3 | Rinse body with damp cloth or low-pressure water | Never use high-pressure washer directly on motor, display, battery compartment, or controller compartment |
| 4 | Use neutral car wash soap for stubborn stains | Avoid strong acids or alkalis |
| 5 | Rinse thoroughly with clean water | Ensure no cleaner residue remains |
| 6 | Wipe dry with clean cloth, especially metal parts | Prevent rust formation |
| 7 | Air dry or use low-pressure air to blow electrical components dry | Ensure completely dry before powering on |
⚠️ WARNING: High-pressure water can force moisture into motor seals, display waterproof covers, battery compartment seals, and other areas, causing electrical failures. Water pressure should be ≤ 1,000 psi with nozzle at least 30 cm from the vehicle surface.
2. Battery Compartment Cleaning
| Step | Operation | Precautions |
|---|---|---|
| 1 | Power off, disconnect battery | Prevent short circuits |
| 2 | Open battery compartment cover | Check for water ingress or foreign objects |
| 3 | Clean dust with dry cloth or vacuum | Never use water |
| 4 | Inspect seal condition | Replace if aged or damaged |
| 5 | Check wire routing | Ensure no pinching or chafing |
| 6 | Ensure completely dry before reinstalling battery |
3. Controller Compartment Cleaning
| Step | Operation | Precautions |
|---|---|---|
| 1 | Power off | |
| 2 | Open controller compartment cover (if applicable) | |
| 3 | Blow dust with dry compressed air | Pressure ≤ 30 psi to avoid component damage |
| 4 | Inspect heatsink fins | Clear clogged dust and debris |
| 5 | Check wiring connectors | Ensure tight, waterproof covers seated |
| 6 | Do not touch controller circuit board | Static electricity may damage sensitive components |
4. Chain/Drive Components (if applicable)
Note: The I-X5 uses direct-drive hub motors and has no chain, belt, or driveshaft. If your vehicle is equipped with optional accessories (such as a trailer axle), please follow the instructions provided with those accessories.
5. Fastener Inspection and Torque Specifications
5.1 Critical Fastener Inspection Schedule
| Fastener Location | Inspection Interval | Standard Torque |
|---|---|---|
| Handlebar Riser Bolts | Before every ride | 25–30 N·m |
| Handlebar Cross-Clamp Bolts | Weekly | 15–20 N·m |
| Wheel Bolts/Nuts | Weekly | 80–100 N·m |
| Suspension Control Arm Bolts | Monthly | 45–55 N·m |
| Shock Absorber Mounting Bolts | Monthly | 35–45 N·m |
| Seat Base Mounting Bolts | Weekly | 15–20 N·m |
| Storage Box Mounting Bolts | Weekly | 10–12 N·m |
| Battery Compartment Mounting Bolts | Monthly | 20–25 N·m |
| Main Frame Bolts | Quarterly | Professional inspection required |
| Trailer Hitch Bolts (if equipped) | Before each use | 50–60 N·m |
Procedure: Use a torque wrench to re-tighten to the specified values. If bolts are found loose, stripped, or broken, replace them immediately.
6 Brake System Maintenance
6.1 Brake Fluid Replacement
| Item | Specification |
|---|---|
| Replacement Interval | Every 12 months or 2,000 km |
| Fluid Specification | DOT 4 Brake Fluid |
| Replacement Volume | Approximately 200–300 ml (front and rear combined) |
| Key Points | Professional technician recommended; bleeding tools required |
Brake Fluid Replacement Procedure (Reference):
- Prepare fresh DOT 4 fluid, syringe, bleed hose, and wrenches
- Extract old fluid from reservoir, add new fluid
- Bleed from each wheel caliper bleed screw
- Squeeze brake lever repeatedly until no bubbles emerge
- Top up fluid to MAX line
- Test braking performance
6.2 Brake Pad Replacement
| Item | Specification |
|---|---|
| Replacement Criterion | Pad thickness < 2 mm, or audible metallic scraping |
| Replacement Interval | Typically 1,000–3,000 km depending on usage |
| Key Points | Remove caliper → extract old pads → clean caliper → install new pads → reset piston → test |
Note: After replacing brake pads, perform 20–30 light braking cycles to bed them in. New pads require this bedding-in process to achieve optimal stopping power.
6.3 Brake Rotor Inspection
| Inspection Item | Standard | Corrective Action |
|---|---|---|
| Thickness | ≥ minimum thickness marking (typically 3–4 mm) | Replace rotor |
| Surface Flatness | No deep scoring, no warping | Resurface or replace |
| Cracks | No radial cracks | Replace immediately |
7.Tire Maintenance
7.1 Tire Replacement Criteria
| Condition | Action |
|---|---|
| Tread depth < 3 mm | Replace tire |
| Sidewall cuts or bulges | Replace immediately (not repairable) |
| Tread puncture > 6 mm diameter | Replace tire |
| Tire aging (cracking, hardening) | Replace tire |
| Uneven wear (cupping/scalloping) | Inspect suspension and alignment; replace tire |
7.2 Tire Repair (Tubeless)
| Repair Method | Application | Key Points |
|---|---|---|
| Plug Repair | Small punctures (< 3 mm) | Use dedicated plug tool, insert from outside |
| Patch Repair | Larger holes or internal damage | Remove tire, scuff inside, apply patch |
| Sealant | Emergency use | Inject tire sealant, inflate, drive slowly to distribute evenly |
Note: Repaired tires are not recommended for high-speed or heavy-load use. Sidewall damage is never repairable — the tire must be replaced.
7.3 Wheel Maintenance
| Item | Interval | Procedure |
|---|---|---|
| Wheel Cleaning | Monthly | Remove mud and brake dust |
| Wheel Runout Check | Quarterly | Spin wheel; runout > 2 mm requires truing |
| Wheel Bearing Check | Quarterly | Shake wheel to feel for play; replace if noisy or loose |
| Wheel Seals | Quarterly | Check seal condition to prevent sand/water ingress |
8 Suspension System Maintenance
8.1 Shock Absorber Maintenance
| Item | Interval | Procedure |
|---|---|---|
| Visual Inspection | Monthly | Check for oil leaks, scratches on shock body |
| Performance Test | Monthly | Press body corners; rebound should be smooth without hesitation |
| Height Adjustment | As needed | Adjust preload based on load and terrain |
| Replacement | When leaking or failed | Replace with identical specification unit |
8.2 Suspension Bushings and Bearings
| Item | Interval | Procedure |
|---|---|---|
| Bushing Inspection | Quarterly | Check for cracks, deformation, play |
| Bearing Inspection | Quarterly | Rotate to check for noise, binding |
| Lubrication | Quarterly | Clean and apply waterproof grease |
| Replacement | When worn or damaged | Use original manufacturer parts |
9 Electrical System Maintenance
9.1 Battery Maintenance (See Chapter 6 for Details)
| Item | Interval | Key Points |
|---|---|---|
| Visual Inspection | Before each charge | No deformation, no leakage |
| Terminal Cleaning | Monthly | Wipe with dry cloth to prevent oxidation |
| Charge Calibration | Monthly | Perform one full charge/discharge cycle |
| Long-Term Storage | Seasonal | Store at 50% charge; check monthly |
9.2 Motor Maintenance
| Item | Interval | Procedure |
|---|---|---|
| Visual Inspection | Monthly | Check motor housing for cracks or damage |
| Cooling Check | Monthly | Clean dust from motor heatsink fins |
| Bearing Check | Quarterly | Spin wheel; listen for unusual noise |
| Seal Check | Quarterly | Inspect motor shaft seal for aging |
| Insulation Test | Annually | Professional technician measures insulation resistance |
Note: Hub motors are sealed units. Never disassemble by non-professionals. Contact after-sales service for motor issues.
9.3 Controller Maintenance
| Item | Interval | Procedure |
|---|---|---|
| Cooling Check | Monthly | Clean heatsink dust; ensure adequate ventilation |
| Connection Check | Monthly | Verify connectors are tight; waterproof covers seated |
| Waterproof Check | Quarterly | Inspect compartment for water ingress after water crossings |
| Parameter Calibration | Annually | Professional technician required |
9.4 Display and Wiring Harness Maintenance
| Item | Interval | Procedure |
|---|---|---|
| Display Cleaning | Weekly | Wipe screen with soft, slightly damp cloth |
| Screen Protection | Long-term | Avoid prolonged sun exposure to prevent UV aging |
| Wiring Check | Monthly | Inspect for chafing, pinching, exposed wires |
| Connector Waterproofing | After each water crossing | Verify waterproof covers are seated; dry before use |
10 Seasonal Maintenance
10.1 Spring Maintenance (Pre-Season Preparation)
| Item | Procedure |
|---|---|
| Battery Status | Charge to 100%, test range |
| Tire Pressure | Adjust to standard values |
| Brake System | Check fluid level; test braking performance |
| Suspension | Inspect shocks; adjust preload |
| Lighting | Test all lights |
| Lubrication | Service all lubrication points |
| Fasteners | Re-torque all critical bolts |
10.2 Summer Maintenance
| Item | Procedure |
|---|---|
| Battery Cooling | Avoid direct sunlight; park in shade |
| Tire Pressure | Pressure rises in heat; deflate as needed |
| Brake System | Frequent braking heats fluid; monitor brake feel |
| Cooling System | Clean controller and motor heatsinks |
10.3 Fall Maintenance
| Item | Procedure |
|---|---|
| Tire Preparation | Check tread; prepare winter tires if needed |
| Battery Insulation | Check battery compartment seals before cold weather |
| Rust Prevention | Clean frame; apply rust inhibitor |
| Lubrication | Service all lubrication points |
10.4 Winter Maintenance (Long-Term Storage)
| Item | Procedure |
|---|---|
| Battery Storage | Remove or disconnect battery; store at 50% charge in a warm location |
| Body Cleaning | Thoroughly clean and dry before storage |
| Rust Prevention | Apply rust-preventive oil to metal parts |
| Tire Protection | Inflate to upper pressure limit to prevent flat-spotting |
| Suspension Protection | Jack up vehicle to relieve spring pressure |
| Covering | Use breathable cover to protect from dust and moisture |
| Periodic Start-up | Power on and check monthly to prevent electronic component moisture damage |
11 Maintenance Record Log
It is recommended to maintain a service log documenting all maintenance activities:
| Date | Mileage (km) | Service Performed | Parts Replaced | Technician | Notes |
|---|---|---|---|---|---|
12 Maintenance Tool List
| Tool | Purpose | Recommendation |
|---|---|---|
| Torque Wrench (5–100 N·m) | Tighten bolts to specifications | Essential |
| Hex Key Set (2–10 mm) | Body bolt removal/installation | Essential |
| Phillips/Flathead Screwdrivers | Cover and connector access | Essential |
| Adjustable/Combination Wrenches | Nut removal/installation | Essential |
| Tire Pressure Gauge | Measure tire pressure | Essential |
| Multimeter | Electrical fault diagnosis | Recommended |
| Grease Gun | Lubrication service | Recommended |
| Dry Cloths/Brushes | Body cleaning | Essential |
13 Troubleshooting Common Issues
| Problem | Possible Causes | Corrective Action |
|---|---|---|
| Vehicle pulls to one side | Uneven tire pressure / Suspension asymmetry | Adjust pressure; inspect suspension |
| Brake judder during stopping | Warped rotor / Uneven pad wear | Resurface/replace rotor; replace pads |
| Suspension noise | Worn bushings / Failed shocks / Loose bolts | Replace bushings/shocks; tighten bolts |
| Heavy steering | Dry riser bearings / Low tire pressure | Lubricate bearings; inflate tires |
| Motor noise | Worn bearings / Stator rub | Contact after-sales service |
| Display malfunction | Loose wiring / Display failure | Check connectors; contact after-sales |
| Reduced range | Battery aging / Low tire pressure / Brake drag | Test battery; inflate tires; check brakes |
A well-maintained I-X5 will carry you across countless mountains and wilderness expanses. Consider maintenance as a conversation with your vehicle—each inspection is a promise of safety, and every service is a tribute to the adventures that await.